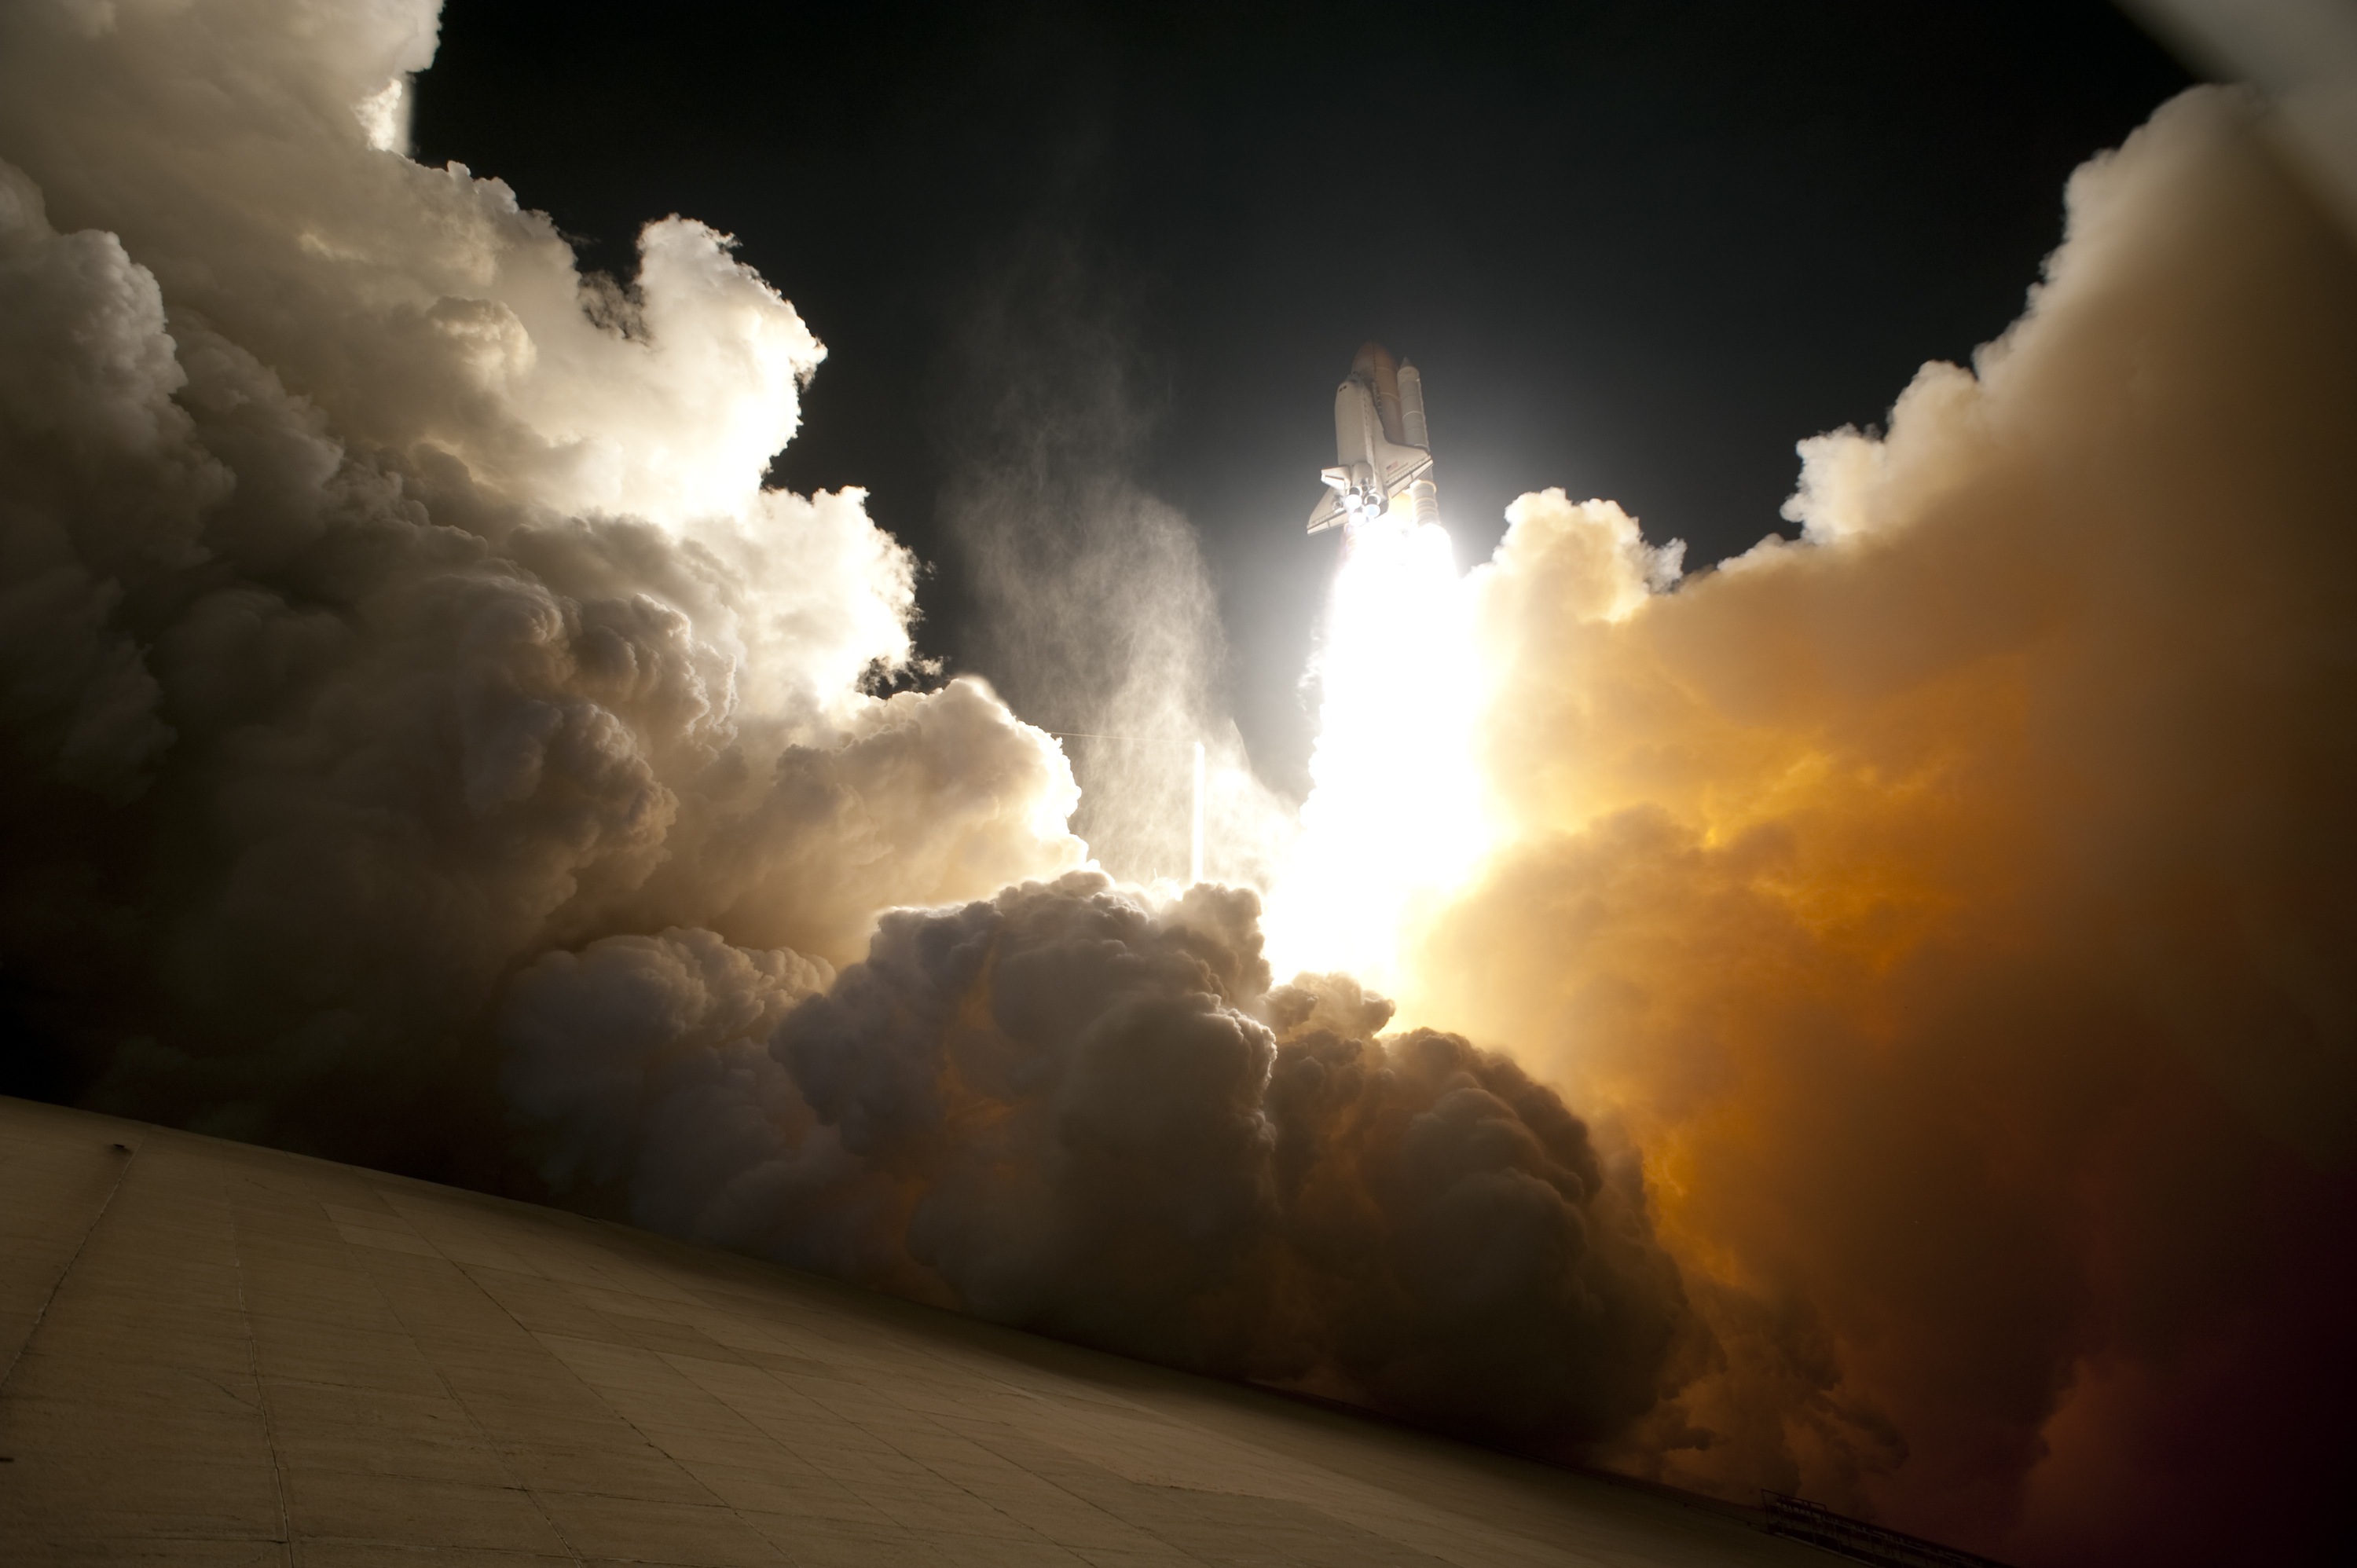
Today's the anniversary of Shuttle Columbia's maiden flight in 1981.
Here's the original STS-1 launch video:
...and a fan-edit putting a shuttle launch to "Countdown" by Rush:
It looks like mostly Shuttle Discovery footage, but I won't quibble--a shuttle launch is a shuttle launch, and they still choke me up and give me goosebumps even when I know what'll happen next.
Showing posts with label Space. Show all posts
Showing posts with label Space. Show all posts
Saturday, April 12, 2014

Tuesday, January 28, 2014
Pic of the Day: For the folks who didn't make it.

Here's to Apollo 1, the Shuttles Challenger and Columbia, and all the other folks who didn't make it home.
Tuesday, September 10, 2013
Pic of the Day: Revell 1:96 Saturn V build, Part 6--Still on the S-IC
Calling this "Part 6," though I haven't been diligent in numbering all the previous Revell Saturn V posts. Sorry. Just go here or click on the "Saturn V" label at the end of the post to see the others.
Still working--very slowly--on the S-IC. I did make some significant progress in recent weeks after almost 2 years of leaving the thing in the box.
I wrote about the big, ugly gaps along the edge of the two wraps forming the O2 and kerosene tanks back in August. Did something about them shortly after that.

It took some careful work with a straight/chisel X-Acto blade to cut the pins holding the two upper halves. The stage is pretty big and bulky and I didn't want to cut into the wraps, but everything went smoothly.
Once I had the O2 tank wrap exposed, I got to work cutting the overlapping end away. This amounts to a 1/4"-wide strip, as seen above. Then I ran some liquid model cement under the new edge of the wrap and held it with my fingers until it set, working a little at a time. There's still an overlap, but at least it will be covered by the upper half of the systems tunnel when it's glued on.


I've yet to glue up the second and third stages, but I'll be using the lessons from this one to do them both right the first time.
Monday, September 2, 2013
Pic of the Day: A Room Full of Saturn V F-1 Rocket Engines
.jpg)
--a pair of thrust chambers to the right waiting for their plumbing followed by several more that have been plumbed. It looks like the last one in line has a red shipping cover like the last one on the left.
--the first on the left is getting something welded (pretty neat that the guy's head is mostly clear, but his welding mask is blurred as if he was shot in the act of flipping it). From the looks of some of the other engines, I think he's welding those rectangular tabs onto the "hat bands." These have threaded studs on them for later attachment of insulation blankets to protect the engines from each others' exhaust plumes during launch and flight.
--the last on the left looks like it's being shipped out; it's on a cart and has a shipping cover, but I wonder where the interface panel on top is?
If you zoom in on the closer ones, you can see the tubing that forms the bell-shaped thrust chamber. There are 178 of the larger ("primary") tubes forming the top end and 356 smaller ("secondary") tubes forming the lower end, all brazed together and reinforced by "hat bands". Each primary is brazed to a pair of secondaries. Kerosene fuel is directed to the "down" primaries and their associated secondaries and flows all the way to the bottom, collecting heat as it goes. The hot fuel is redirected upward through the "up" tubes and into the engine injectors to be burned. This "regenerative cooling" keeps the thrust chamber from melting.
There's an extensive tech writeup on the thrust chambers' construction here, at Heroic Relics.
Each one of these monsters burned my car's weight in kerosene and liquid oxygen every SECOND. Just one engine put out some 1.5 million pounds of thrust--more than 1-1/2 times the total thrust of all five of the dinky J-2 engines on the Saturn V's second stage.
Some trivia:
Weight 18,500 pounds dry
Height 19 feet
Diameter 12.3 feet
98 production engines
82 development engines
7 serialized mockups
1 shop-floor engineering model
65 engines flown on 13 Saturn V missions
Most of the R&D engines were destroyed in testing
37 engines remain as museum displays or whatever; MSFC disassembled at least one F-1 in 2011 to study for possible restart of F-1 builds (or derivative engines) for the new Space Launch System.
--
As a tie-in for the Revell 1:96 Saturn V project, the kit's engines have some sketchy outside detail, but nothing inside the bells. Granted, you're not really expected to pick the model up to look in the engines, since it's supposed to be displayed standing vertically. The engines aren't correct, anyway, since they're covered in insulation blankets before the rocket's rolled out to the launch pad (good picture of the blanket here, at Up-Ship's Unwanted Blog. RealSpace Models sells a set of properly blanketed F-1's for about $30.
I'm not planning on doing any superdetailing on my Saturn at the moment. I'll be content with cleaning up the existing engines and using different shades of silver to make them look...well, better than this:

Tuesday, August 27, 2013
Pic of the Day: NASA's badass Saturn V S-IC

Boeing's full-scale item has much better detail than my Revell 1/96 kit...

...but then theirs cost a lot more and was made of stronger stuff.
I haven't done anything with mine since December of 2011, when I scribbled my last review of the kit. In the past few weeks, I pulled the model out, looked it over and decided that I can work with it.
I'm still not thrilled with Revell's design decisions, where each of the three stages are made of solid styrene end-caps joined by rolled-up styrene sheets. There's an ugly, very visible overlap, especially on the upper half (click on the picture and look along the left side). I didn't use enough clothespins to clamp the thing together.
The other big issue is that the "systems tunnel" (the long pipelike structure on the left, used to clamp the rolled-up sheets into a cylinder) is in two pieces, which don't meet in the middle. There's another such tunnel 180 degrees around on the stage. At this scale, that's a one-foot gap in each of them.
Time for some surgery. I'm going to cut both systems tunnels off, glue them up separately, and re-install them after trimming the excess sheeting off. Hopefully the sheets don't just tear themselves loose when the pipes are removed.
This should be a lot simpler than the approach I was going to use when I first saw how jacked up the thing was. I was going to throw some plastic filler in the gaps and try to sand things smooth.
I'm playing it smarter with the remaining two stages. I'm going to roll the sheet sections up and put them into hot water so they'll stay rolled, then glue them up a little at a time to their end-caps and trim off any overlap. Since each stage has at least one systems tunnel intended to clamp things together, I'll arrange the sheet so that the tunnel covers the seams.
Pre-repair pics of the stage are here.
Monday, January 28, 2013
Apollo 1, Challenger, Columbia


I consider anyone a hero if they're willing to ride a column of flame into space. This week we mark the anniversaries of losing some heroes in the line of duty:
Apollo 1, January 27, 1967
--Command Pilot Virgil "Gus" Grissom
--Senior Pilot Edward H. White
--Pilot Roger B. Chaffee
Shuttle Challenger, STS-51L, January 28, 1986
--Commander Francis R. Scobee
--Pilot Michael J. Smith
--Mission Specialists
----Ellison S. Onizuka
----Judith A. Resnik
----Ronald E. McNair
--Payload Specialists
----Gregory B.Jarvis
----S. Christa McAuliffe (Teacher in Space)
Shuttle Columbia, STS-107, February 1, 2003
--Commander Rick D. Husband
--Pilot William C. McCool
--Mission Specialists
----David M. Brown
----Kalpana Chawla (Flight Engineer)
----Laurel B. Clark
--Payload Commander Michael P. Anderson
--Payload Specialist Ilan Ramon

Saturday, August 25, 2012
Song of the Day: Countdown (Rush)
Instead of a sad song for the passing of Neil Armstrong, I wanted something that expresses the excitement of seeing human ambition paying off.
This is the sort of thing we should be focusing upon--reaching for the stars, walking on the moon, exploring our little corner of the sky.
I'm sad to see Mr. Armstrong go--but what a life he led!
This is the sort of thing we should be focusing upon--reaching for the stars, walking on the moon, exploring our little corner of the sky.
I'm sad to see Mr. Armstrong go--but what a life he led!
Thursday, March 15, 2012
"Ride the Booster"--Shuttle Launch with Sound
Crank up the speakers, boost the subwoofer, and violate your neighborhood noise ordinances!
Sunday, December 11, 2011
Pic of the Day: Revell's Crappy S-IC

It's been a week since I got bored and glued up the first stage of Revell's 1:96 Saturn V moon rocket.
I haven't done anything with it since--but this is it, the ugly truth of 4 hours' work. I'll be upping full-res copies of this and the other pics to my Flickr account soon--I just wanted to throw this up as a "before" shot.
I really like how--with even a little backlight--you can see the markings on the inside-out rolled-sheet sections; I hope that a little primer and proper paint will fix that.
UPDATE: The pics are up.
Friday, December 2, 2011
Kit Review: Revell 1:96 Apollo-Saturn V Part 2--build diary, First Stage
A little more than a year ago, I published a review of this kit based on initial impressions. I didn't do much more than some minor pre-assembly--the first- and second-stage engines, LES tower, and other small stuff.
Tonight, in a fit of boredom, I finally opened the dusty box and pulled out the pieces of the rocket's first stage (the S-IC).
The S-IC consists of three solid "rings" (the structural skirts that formed the two ends and the middle of the stage) and two styrene sheets for the main assembly, a flat plate for the bottom, the four conical engine fairings and their fins, and four half-round pieces that hold the rolled-up styrene sheets.
Given the color mismatch between the sheets and the ring sections they join, I decided to roll them inside-out, shoot a thin coat of primer on the outside, and paint the entire rocket a single shade of white.
I am not impressed with the fit of the sheets, though. I made the mistake of rolling and gluing up the lower piece without test-fitting; the holes punched into both sheets made the rolled pieces too small to fit properly. I opened up the holes on the second sheet just enough to get it to fit.
Both sheets are rolled into cylinders and "pinned" together by half-round "pipes" that run nearly the full length of the stage. When I got the upper half of the stage rolled and tried a test-fit (learned my lesson!), I found that neither of the pipes' upper ends join the lower ends properly (a gap of about 19" across on this scale!). There are also sizable gaps along the length of both rolled-up sheets where the "pipes" hold them in place and around the edges where they're cemented to the "ring" sections. Even with careful assembly, it looks horrible.
The engine fairings are just glued on across the corrugations (stringers) of the bottom ring (the rear skirt) with no effort at molding them to the structure. The real fairings were notched over the stringers where they mounted to the skirt's skin. Time to break out the gap-filling Super Glue.
The fairings and the baseplate have molded-in blocky details that aren't seen on the real ship. I'm just going to leave them alone, since there's enough other work to be done just spackling over the gaps around those rolled sheets.
On its display stand, it stands slightly more than 18" tall. It took about 4 hours to get the first stage assembled to this point--no engines or other small details--and now there's the promise of several hours' worth of filling, sanding and prep before shooting paint.
For the $115 cost of this thing, it would have been nice if Revell had made an effort at producing a better kit.
Given the looks of this first major section of the kit, I might have saved myself a lot of effort by buying the detailing kits I mentioned in Part 1 and scratchbuilding the rest of the thing, buying Apogee's 1:70 scale flying monster for about $300, or even going for the Estes 1:100 flying model for $60.
Revell's offering isn't completely hopeless, though. Author 4D posted details of his own build-up in the Airfix Tribute Forum. The level of detail on his Lunar Module alone makes it worth clicking the link.
Tonight, in a fit of boredom, I finally opened the dusty box and pulled out the pieces of the rocket's first stage (the S-IC).
The S-IC consists of three solid "rings" (the structural skirts that formed the two ends and the middle of the stage) and two styrene sheets for the main assembly, a flat plate for the bottom, the four conical engine fairings and their fins, and four half-round pieces that hold the rolled-up styrene sheets.
Given the color mismatch between the sheets and the ring sections they join, I decided to roll them inside-out, shoot a thin coat of primer on the outside, and paint the entire rocket a single shade of white.
I am not impressed with the fit of the sheets, though. I made the mistake of rolling and gluing up the lower piece without test-fitting; the holes punched into both sheets made the rolled pieces too small to fit properly. I opened up the holes on the second sheet just enough to get it to fit.
Both sheets are rolled into cylinders and "pinned" together by half-round "pipes" that run nearly the full length of the stage. When I got the upper half of the stage rolled and tried a test-fit (learned my lesson!), I found that neither of the pipes' upper ends join the lower ends properly (a gap of about 19" across on this scale!). There are also sizable gaps along the length of both rolled-up sheets where the "pipes" hold them in place and around the edges where they're cemented to the "ring" sections. Even with careful assembly, it looks horrible.
The engine fairings are just glued on across the corrugations (stringers) of the bottom ring (the rear skirt) with no effort at molding them to the structure. The real fairings were notched over the stringers where they mounted to the skirt's skin. Time to break out the gap-filling Super Glue.
The fairings and the baseplate have molded-in blocky details that aren't seen on the real ship. I'm just going to leave them alone, since there's enough other work to be done just spackling over the gaps around those rolled sheets.
On its display stand, it stands slightly more than 18" tall. It took about 4 hours to get the first stage assembled to this point--no engines or other small details--and now there's the promise of several hours' worth of filling, sanding and prep before shooting paint.
For the $115 cost of this thing, it would have been nice if Revell had made an effort at producing a better kit.
Given the looks of this first major section of the kit, I might have saved myself a lot of effort by buying the detailing kits I mentioned in Part 1 and scratchbuilding the rest of the thing, buying Apogee's 1:70 scale flying monster for about $300, or even going for the Estes 1:100 flying model for $60.
Revell's offering isn't completely hopeless, though. Author 4D posted details of his own build-up in the Airfix Tribute Forum. The level of detail on his Lunar Module alone makes it worth clicking the link.
Tuesday, April 12, 2011
Important Day in History
Quite a bit happened on various April 12ths.
The most important, I think, is that Jonas Salk's polio vaccine was called "safe, effective, and potent" in 1955.
In 1961, Yuri Gagarin became the first human to go into space and the first in orbit.
In 1981, the shuttle Columbia took its first flight.
In 1945, Franklin Roosevelt died, just months before the end of the second World War.
In 1983, Chicago got its first black mayor, Harold Washington.
In 1861, the South continued--and deepened--its treason against the United States by attacking Fort Sumter.
The most important, I think, is that Jonas Salk's polio vaccine was called "safe, effective, and potent" in 1955.
In 1961, Yuri Gagarin became the first human to go into space and the first in orbit.
In 1981, the shuttle Columbia took its first flight.
In 1945, Franklin Roosevelt died, just months before the end of the second World War.
In 1983, Chicago got its first black mayor, Harold Washington.
In 1861, the South continued--and deepened--its treason against the United States by attacking Fort Sumter.
Monday, April 11, 2011
Pic of the Day: Does This Rocket Make My Arse Look Fat?

Fair is fair, so here's my chunky self back in August, 2007 standing at the noisy end of the last Saturn first-stage booster to be built, # S-IC-15 at the Michoud Assembly Facility near New Orleans. If not for budget cuts, the completed booster would have been loaded onto a barge, floated to Stennis Space Center just across the Louisiana-Mississippi border, mounted in a test tower, and lit off.
The combined roar of five F-1 engines could be heard as distant thunder as far away as Mobile, Alabama.
Once everything was certified "Go" the booster would go on a barge and take a long boat ride to Cape Canaveral to meet up with the rest of the rocket stack.
Thursday, February 24, 2011
Pic of the Day: Discovery Launches!

This is the shuttle Discovery right at main-engine ignition. Just moments before the flame front from that one engine, there was a cough of soot, something I'd never noticed before. Pretty neat, though.
It sucks not having high-speed internet, having to watch the launch on CNN. There's always YouTube for catching it after the fact, but nothing comes close to seeing it live.
It also sucks that this is Discovery's final flight.
It sucks even more that after the shuttles are done this year, we don't have a spaceship to replace them.
But it's utterly cool seeing those mains light up, seeing the entire shuttle stack leaning as they build up thrust. Then the solids ignite and everyone who remembers Challenger gets a lump in the throat, watching those boosters for telltale tails of flame, or thinking of Columbia we're looking for chunks of foam or ice. It's always a relief when the boosters separate safely and when the ship's wheels-down on the pavement again.
Wednesday, December 22, 2010
Pic of the Day: Solstice Eclipse

I think this was my first lunar eclipse. I got lucky with the weather--not a cloud in the sky. I wish I'd had better equipment, though--like a digital camera with manual focus.
This is the best of a dozen attempts at holding my Fuji A345 4.1megapixel camera up to my telescope's eyepiece and tripping the shutter.
The pics don't compare well to the real thing, though. With the advancing copper-colored shadow slowly eating its way across the moon, the craters and seas stood out nicely. In the bright crescent, there were three large seas (Tranquility, Nectar, and Fecundity--keep in mind that this image is upside down!) that seemed to form a terrified face screaming as it was engulfed.
Monday, September 27, 2010
Kit Review: Revell 1:96 Apollo-Saturn V
This beast set me back $115 a couple of years ago. It's easier to store than the real thing, but a four-and-a-half-foot plastic model lacks the towering scare-the-neighbors quality of a 365-foot-tall rocket stack.
Even at 1:96 the size, this is a big model, standing around 4 feet. It was originally produced in the 1960's, with re-issues by Revell Germany from time to time. Mine is boxed for 1994, the 25th Anniversary of Apollo 11. Kind of sad if it sat in various warehouses before I bought it in 2007. Even the dust is historic.
The kit's primarily molded in white; some parts that are supposed to have a "natural metal" finish (the Command Module, Service Module, and Lunar Module) are done in a dark silver-gray. There are four styrene sheets that get rolled into cylinders to form sections of each of the three booster stages; these come pre-printed with roll patterns, flags, and "USA" or "United States" insignia. Two packs of "Bare-Metal" foil are included to get the proper natural-metal finish on some of those silver-gray parts.
Assembly is easy, with a small amount of easily-trimmed flash on some pieces. You'll need to do some careful filing and trimming on the join-lines on all of the rocket engines, the Lunar Module, and the Service Module. Because of that silver-gray plastic, the joins are especially visible on the latter. Detail is reasonable for an entry-level off-the-shelf kit.
The three booster stages--the S-IC, S-II, and S-IVB--are each built up by rolling a styrene sheet, pinning the edges between parts that simulate external pipes, then cementing endcaps to each open end. The first stage uses two such sheets and three "caps." The second and third each use one sheet and two caps. Detail and fit are good, but those styrene sheets seem flimsy and thin. If you're not looking to super-detail the kit (just assembling it straight from the box), paint the inside surfaces of the sheets and the end-caps black to keep any back-lighting from showing through. I'd prefer that the exterior markings and insignia had been done as decals so that the whole thing can be painted the same color, but I'm lazy enough these days that I'd rather just put the thing together with the least amount of fuss and financial outlay.
One big howler common to most of the Saturn V models on the market: the black bands of the S-IC roll pattern extend halfway up the length of the stage. This was only seen on the 500F Facilities Integration Vehicle, not any of the actual flight ships (Apollo 4's first stage did have them originally, but most of the black was painted over).
The Command Module is too detailed if you're building the kit in "launch" configuration; the actual CM has a protective cover over it which is jettisoned a few minutes after the rocket has left the pad. Revell's CM doesn't have the cover. Fortunately, The Google can find aftermarket detail sets that will help make the beast more accurate. There's a detailed description of what's in the resin-and-etched-brass detail kit at Ninfinger Productions.
Another issue is that the Command and Service Modules are Block I items. Think of them as working prototypes not intended for manned operation. The correct Block II items are significantly different.
If you're really serious about detailing, you could end up replacing most of the Revell kit with aftermarket pieces. It'd make more sense to just buy the detailing kits and scratchbuild the rest. Either way, a visit to Rick Sternbach's Saturn V Clinic will give you more than enough to do.
If you want one that flies, you could scratchbuild a 25-foot beast like the Arizona Rocketry Team's 1/16 rocket (shots of the Command Module being built here) or shell out $450 for an EMMR 1/48 scale flying rocket kit that'll take up less room than theirs but still be twice as large as Revell's. And it'll fly. Did I mention that it flies?
Overall, the Revell model isn't a bad kit. It'll take up lots of room on your workbench, require plenty of rubber bands, clothespins, cement, paint, filing, filling, and all the other tools and skills you need for a model--just more of it.
Just don't detail it the same way whomever built the kit on display at Pensacola's National Museum of Naval Aviation; theirs is the same 1/96 kit with a sloppy white paint job (done with a house brush?) and a bright red escape tower (also sloppily painted). It really looks bad, especially given their modest space display that includes the Command Module from Skylab 2 and a moon buggy.
Pro: Impressively big; easily assembled; pre-printed styrene sheets simulate the original's black & white roll patterns; better detail than the smaller 1:144-scale model.
Con: Expensive; the solid pieces and the styrene sheets aren't the same shade of white; poor mating between some significant parts, leading to lots of time prettying it up; big footprint (you're gonna need a bigger desk); first-stage roll pattern matches the 500F; poor detailing or incorrect detailing on significant parts of the stack; no decals for camera targets, fin or stage markings.
Even at 1:96 the size, this is a big model, standing around 4 feet. It was originally produced in the 1960's, with re-issues by Revell Germany from time to time. Mine is boxed for 1994, the 25th Anniversary of Apollo 11. Kind of sad if it sat in various warehouses before I bought it in 2007. Even the dust is historic.
The kit's primarily molded in white; some parts that are supposed to have a "natural metal" finish (the Command Module, Service Module, and Lunar Module) are done in a dark silver-gray. There are four styrene sheets that get rolled into cylinders to form sections of each of the three booster stages; these come pre-printed with roll patterns, flags, and "USA" or "United States" insignia. Two packs of "Bare-Metal" foil are included to get the proper natural-metal finish on some of those silver-gray parts.
Assembly is easy, with a small amount of easily-trimmed flash on some pieces. You'll need to do some careful filing and trimming on the join-lines on all of the rocket engines, the Lunar Module, and the Service Module. Because of that silver-gray plastic, the joins are especially visible on the latter. Detail is reasonable for an entry-level off-the-shelf kit.
The three booster stages--the S-IC, S-II, and S-IVB--are each built up by rolling a styrene sheet, pinning the edges between parts that simulate external pipes, then cementing endcaps to each open end. The first stage uses two such sheets and three "caps." The second and third each use one sheet and two caps. Detail and fit are good, but those styrene sheets seem flimsy and thin. If you're not looking to super-detail the kit (just assembling it straight from the box), paint the inside surfaces of the sheets and the end-caps black to keep any back-lighting from showing through. I'd prefer that the exterior markings and insignia had been done as decals so that the whole thing can be painted the same color, but I'm lazy enough these days that I'd rather just put the thing together with the least amount of fuss and financial outlay.
One big howler common to most of the Saturn V models on the market: the black bands of the S-IC roll pattern extend halfway up the length of the stage. This was only seen on the 500F Facilities Integration Vehicle, not any of the actual flight ships (Apollo 4's first stage did have them originally, but most of the black was painted over).
The Command Module is too detailed if you're building the kit in "launch" configuration; the actual CM has a protective cover over it which is jettisoned a few minutes after the rocket has left the pad. Revell's CM doesn't have the cover. Fortunately, The Google can find aftermarket detail sets that will help make the beast more accurate. There's a detailed description of what's in the resin-and-etched-brass detail kit at Ninfinger Productions.
Another issue is that the Command and Service Modules are Block I items. Think of them as working prototypes not intended for manned operation. The correct Block II items are significantly different.
If you're really serious about detailing, you could end up replacing most of the Revell kit with aftermarket pieces. It'd make more sense to just buy the detailing kits and scratchbuild the rest. Either way, a visit to Rick Sternbach's Saturn V Clinic will give you more than enough to do.
If you want one that flies, you could scratchbuild a 25-foot beast like the Arizona Rocketry Team's 1/16 rocket (shots of the Command Module being built here) or shell out $450 for an EMMR 1/48 scale flying rocket kit that'll take up less room than theirs but still be twice as large as Revell's. And it'll fly. Did I mention that it flies?
Overall, the Revell model isn't a bad kit. It'll take up lots of room on your workbench, require plenty of rubber bands, clothespins, cement, paint, filing, filling, and all the other tools and skills you need for a model--just more of it.
Just don't detail it the same way whomever built the kit on display at Pensacola's National Museum of Naval Aviation; theirs is the same 1/96 kit with a sloppy white paint job (done with a house brush?) and a bright red escape tower (also sloppily painted). It really looks bad, especially given their modest space display that includes the Command Module from Skylab 2 and a moon buggy.
Pro: Impressively big; easily assembled; pre-printed styrene sheets simulate the original's black & white roll patterns; better detail than the smaller 1:144-scale model.
Con: Expensive; the solid pieces and the styrene sheets aren't the same shade of white; poor mating between some significant parts, leading to lots of time prettying it up; big footprint (you're gonna need a bigger desk); first-stage roll pattern matches the 500F; poor detailing or incorrect detailing on significant parts of the stack; no decals for camera targets, fin or stage markings.
Wednesday, September 22, 2010
Pic of the Day: Lightning at Stennis Space Center

This is a screen-capture from a camcorder; not the best but still pretty cool.
This was at Mississippi's Stennis Space Center in January 2007. There was a storm off to the south, near the rest area/Welcome Center. Museum nannies made everyone go back inside the museum: can't have the little snowflake taxpayers getting hit by lightning, right? I hung out on the front porch and aimed my camcorder toward the sounds of thunder and hoped for something interesting. For once, something interesting happened.
Friday, September 3, 2010
Pic of the Day: Discovery Shuttle night launch
STS-63. The shuttles aren't as cool as the Apollo missions, but they do make for spectacular imagery.

It's a shame that their missions will end in the next year. I never got to see a launch "live." TV isn't even close.

It's a shame that their missions will end in the next year. I never got to see a launch "live." TV isn't even close.
Pic of the Day: Gemini 9 launch
A few years ago, some awesome guy uploaded a ton or so of good NASA pics from the various space missions. It was heavy on Apollo, and I was stoked, since that's my favorite era of man in space.
But there were some eye-popping pics from the Mercury and Gemini missions as well. For no other reason than the fact that it made my jaw drop 2 years ago, here's Gemini 9 just taking flight, still several yards from clearing the tower, with engines blazing:

Super cool.
But there were some eye-popping pics from the Mercury and Gemini missions as well. For no other reason than the fact that it made my jaw drop 2 years ago, here's Gemini 9 just taking flight, still several yards from clearing the tower, with engines blazing:

Super cool.
Wednesday, January 27, 2010
Road Trip: Stennis-Pike #1, Part 2
Yup. I missed the last bus out to Stennis. Shrug. I hopped back in the Tracker after getting some pictures of the LEM display. Time to go to Fort Pike.
The Stennis exit from I-10 is only a few miles from the Louisiana border. A little further on, it bends southward...left on 190...wrecked boats, wrecked homes, a boat sitting upside down in a field...happy-looking homes to my right, families seemingly untouched by the hurricane a year past...dead-end into US-90, go right. At the time, there was an old, narrow steel bridge across the Rigolets (the southeast pass into Lake Pontchartrain) and a slowly-growing concrete flyover bridge that has since been completed. I was about halfway across the span when I spotted Fort Pike.
Pike's a small pie-slice of a fort--much smaller than Fort Pickens, but it's really all about location. If you look at this Fort Wiki page, you can see that there's no room for a larger structure on the tip of St. Catherine Island. Pike was intended to block the channel to the east between Lake Borgne (and the Gulf of Mexico) and Lake Pontchartrain.
It was in pretty bad shape. Hurricane Katrina's eye (2005) had rolled almost directly over the fort (just slightly east of it--but Mississippi and Alabama caught the worst of the storm in the teeth). There was a wide section of wall near the north corner that looked ready to fall out, plainly-visible damage to the bricks facing on the water (from boat wakes?), stagnant water in the landward moat. The place was still closed, pending repairs and cleaning. It reopened some 2-1/2 years after Katrina, only to be closed again by Hurricanes Gustav and Ike in 2008. It re-reopened in 2009, and since I've never been inside, it's time for another road trip!
I spent maybe an hour walking around outside, exploring and taking pictures (look for Pike & Macomb group). Aside from the sound of occasional cars, it was quiet and peaceful--one of the main things I like about these old buildings. A single pelican watched me from the water, which was calm despite the brisk wind. There was hardly a reminder of Katrina's violence, if I stood in the right place.
There were plenty of reminders, though, once I got back in the Tracker and rolled west along US-90 toward my next stop, Fort Macomb, just a few miles away at the other end of St. Catherine Island. Just a few hundred feet from the fort's parking lot, there were concrete slabs where houses had been...Maucle, Chagnard, Touche, Jacobs, Hassler, the streets were there, and the private boat slips, branches from a canal running south from the fort; we have a snapshot in Google Maps at Pike's Fort Wiki of the days and months after those houses were wiped and scraped and crushed into kindling. The entire length of the island looked like this...a standing house here, pilings sticking up like a convention of phone poles there...a burned-up excavator...portable toilets standing or scattered...boats seemingly parked on the side of the road, boats upturned or smashed in yards...downed trees...another narrow steel bridge ahead: Chef Menteur Pass. Across this is Fort Macomb.
This is another pie-slice-shaped fort, built along the same lines as Fort Pike, but it hasn't weathered the decades since its abandonment nearly as well. I couldn't get close enough to see much of its condition; there's a parking area between US-90 and the fort, but it was fenced off and I'm too much of a conformist to just hop or climb and go (maybe next time!). There used to be a marina along the south front; you can see the roof of it in the Google Map embedded in the fort's Wiki page. The entire ground-level of the building was torn out and half the slips contained sunken or half sunken boats hanging from their moorings. The marina lot had bits and pieces of other boats and--weirdest of all--the roof of a car. I still wonder if there was a car buried there and (this being Louisiana) who was in it.
I wandered around and took more pictures (remember--Pike & Macomb group)...and then there was the long drive home, coming in Part 3!
The Stennis exit from I-10 is only a few miles from the Louisiana border. A little further on, it bends southward...left on 190...wrecked boats, wrecked homes, a boat sitting upside down in a field...happy-looking homes to my right, families seemingly untouched by the hurricane a year past...dead-end into US-90, go right. At the time, there was an old, narrow steel bridge across the Rigolets (the southeast pass into Lake Pontchartrain) and a slowly-growing concrete flyover bridge that has since been completed. I was about halfway across the span when I spotted Fort Pike.
Pike's a small pie-slice of a fort--much smaller than Fort Pickens, but it's really all about location. If you look at this Fort Wiki page, you can see that there's no room for a larger structure on the tip of St. Catherine Island. Pike was intended to block the channel to the east between Lake Borgne (and the Gulf of Mexico) and Lake Pontchartrain.
It was in pretty bad shape. Hurricane Katrina's eye (2005) had rolled almost directly over the fort (just slightly east of it--but Mississippi and Alabama caught the worst of the storm in the teeth). There was a wide section of wall near the north corner that looked ready to fall out, plainly-visible damage to the bricks facing on the water (from boat wakes?), stagnant water in the landward moat. The place was still closed, pending repairs and cleaning. It reopened some 2-1/2 years after Katrina, only to be closed again by Hurricanes Gustav and Ike in 2008. It re-reopened in 2009, and since I've never been inside, it's time for another road trip!
I spent maybe an hour walking around outside, exploring and taking pictures (look for Pike & Macomb group). Aside from the sound of occasional cars, it was quiet and peaceful--one of the main things I like about these old buildings. A single pelican watched me from the water, which was calm despite the brisk wind. There was hardly a reminder of Katrina's violence, if I stood in the right place.
There were plenty of reminders, though, once I got back in the Tracker and rolled west along US-90 toward my next stop, Fort Macomb, just a few miles away at the other end of St. Catherine Island. Just a few hundred feet from the fort's parking lot, there were concrete slabs where houses had been...Maucle, Chagnard, Touche, Jacobs, Hassler, the streets were there, and the private boat slips, branches from a canal running south from the fort; we have a snapshot in Google Maps at Pike's Fort Wiki of the days and months after those houses were wiped and scraped and crushed into kindling. The entire length of the island looked like this...a standing house here, pilings sticking up like a convention of phone poles there...a burned-up excavator...portable toilets standing or scattered...boats seemingly parked on the side of the road, boats upturned or smashed in yards...downed trees...another narrow steel bridge ahead: Chef Menteur Pass. Across this is Fort Macomb.
This is another pie-slice-shaped fort, built along the same lines as Fort Pike, but it hasn't weathered the decades since its abandonment nearly as well. I couldn't get close enough to see much of its condition; there's a parking area between US-90 and the fort, but it was fenced off and I'm too much of a conformist to just hop or climb and go (maybe next time!). There used to be a marina along the south front; you can see the roof of it in the Google Map embedded in the fort's Wiki page. The entire ground-level of the building was torn out and half the slips contained sunken or half sunken boats hanging from their moorings. The marina lot had bits and pieces of other boats and--weirdest of all--the roof of a car. I still wonder if there was a car buried there and (this being Louisiana) who was in it.
I wandered around and took more pictures (remember--Pike & Macomb group)...and then there was the long drive home, coming in Part 3!
Monday, January 25, 2010
Road Trip: Stennis Space Center & Fort Pike, #1, part 1
This was the second-coldest day I've spent (second only to that bicycle ride to work) on the road as far as temperature, but this one seemed colder at times.
It was December of 2006; I'd been hoping to drive down to Kennedy Space Center to see the night-time shuttle launch sceduled for early that month. But things fell through with the other 3 guys who were supposed to be going, and I was the only one able to go--assuming I was willing to drive my '92 Tracker and camp in the damn thing.
If it were a hardtop, maybe. But it's a ragtop--and that zip-up rear window never zipped back after the one time I was able to get the zipper loose. I tried several things to at least make the window close up, if only to keep the neighbor's cats from shedding hair all over my seats. I ended up sewing bungee cords around the three free sides (the bottom is held to the tailgate by clips), then sewing fish-hooks with the barbs cut off to places around the opening.
Cats can't get in...but the weather isn't bothered. I have a tarp for that, but I can't drive the thing with the tarp up. That's an important detail.
Kennedy was out. I decided that I was going somewhere, but I didn't want to go to Fort Gaines or Fort Morgan. Had to be something new and reasonably close, so I picked Fort Pike in Louisiana and Stennis Space Center in Mississippi, just because it was on the way.
Dec. 8th dawned freaking cold, something like 27F with a wind chill below zero and 15-20 mile per hour winds gusting to 25 to 30 out of the west. I loaded up the Tracker, hit the highway, and cranked that heater all the way up.
Good thing I had a coat and gloves. The heat felt good right at the vent, but from where I was sitting it might as well have been off. At least I was driving into the wind--but every time an 18-wheeler passed me, covering me in shadow, the temperature in the Tracker went down 20 degrees.
Interstate 10 is dead boring, an endless double-ribbon stretched between metropoli (or what passes for them in Florida), with little to catch the eye. The most interesting sight is probably the approach to Mobile, Alabama, as you're coming across the bay. This was a year and change after Hurricane Katrina sent a sizable storm surge up Mobile Bay. There used to be restaurants, gas stations, and such at the mid-bay interchange between I-10 and Highway 90, but most of those were reduced to skeletal steel or pilings and loose planks. The battleship USS Alabama had been rocked a noticeable amount, and one of the interchange ramps was knocked off its pilings. Through the Wallace Tunnel, through Mobile, past the I-65 interchange, and I-10 settles back down to its boring gray sleep-inducing self. Across the line into Mississippi, remembering a bumper sticker--"Paddle faster! I hear banjos!"...over the Pascagula River...amusement at the ever-present casino billboards: "Welcome to Mississippi...now GAMBLE! GAMBLE! G A M B L E!!!!! Are you gambling yet?!"...interesting whisps of cloud, high up, catching my eye, and I try to get pictures, only to later realize that the camera was more interested in the Tracker's dirty window glass...Stennis is 11 miles away, now a mile...exit, a left, a right, winding access road to rest area.

Stennis Space Center's welcome center is part of the rest area. Not much there, aside from an impressive Apollo Lunar Module display, complete with the boot prints and signature of Apollo 13's Fred Haise.
The LEM looks pretty big when it's mounted several feet above your head. But it looks pretty small for something that took men down to the surface of an unfriendly moon much colder than I was feeling that day.
I was looking forward to seeing more and went to ask about the next bus to the Space Center itself.
Would you believe I missed the last farking bus? Yup. It left for the Center at 2:30 p.m. I probably passed it on the way into the rest area parking lot.
To Be Continued...
It was December of 2006; I'd been hoping to drive down to Kennedy Space Center to see the night-time shuttle launch sceduled for early that month. But things fell through with the other 3 guys who were supposed to be going, and I was the only one able to go--assuming I was willing to drive my '92 Tracker and camp in the damn thing.
If it were a hardtop, maybe. But it's a ragtop--and that zip-up rear window never zipped back after the one time I was able to get the zipper loose. I tried several things to at least make the window close up, if only to keep the neighbor's cats from shedding hair all over my seats. I ended up sewing bungee cords around the three free sides (the bottom is held to the tailgate by clips), then sewing fish-hooks with the barbs cut off to places around the opening.
Cats can't get in...but the weather isn't bothered. I have a tarp for that, but I can't drive the thing with the tarp up. That's an important detail.
Kennedy was out. I decided that I was going somewhere, but I didn't want to go to Fort Gaines or Fort Morgan. Had to be something new and reasonably close, so I picked Fort Pike in Louisiana and Stennis Space Center in Mississippi, just because it was on the way.
Dec. 8th dawned freaking cold, something like 27F with a wind chill below zero and 15-20 mile per hour winds gusting to 25 to 30 out of the west. I loaded up the Tracker, hit the highway, and cranked that heater all the way up.
Good thing I had a coat and gloves. The heat felt good right at the vent, but from where I was sitting it might as well have been off. At least I was driving into the wind--but every time an 18-wheeler passed me, covering me in shadow, the temperature in the Tracker went down 20 degrees.
Interstate 10 is dead boring, an endless double-ribbon stretched between metropoli (or what passes for them in Florida), with little to catch the eye. The most interesting sight is probably the approach to Mobile, Alabama, as you're coming across the bay. This was a year and change after Hurricane Katrina sent a sizable storm surge up Mobile Bay. There used to be restaurants, gas stations, and such at the mid-bay interchange between I-10 and Highway 90, but most of those were reduced to skeletal steel or pilings and loose planks. The battleship USS Alabama had been rocked a noticeable amount, and one of the interchange ramps was knocked off its pilings. Through the Wallace Tunnel, through Mobile, past the I-65 interchange, and I-10 settles back down to its boring gray sleep-inducing self. Across the line into Mississippi, remembering a bumper sticker--"Paddle faster! I hear banjos!"...over the Pascagula River...amusement at the ever-present casino billboards: "Welcome to Mississippi...now GAMBLE! GAMBLE! G A M B L E!!!!! Are you gambling yet?!"...interesting whisps of cloud, high up, catching my eye, and I try to get pictures, only to later realize that the camera was more interested in the Tracker's dirty window glass...Stennis is 11 miles away, now a mile...exit, a left, a right, winding access road to rest area.

Stennis Space Center's welcome center is part of the rest area. Not much there, aside from an impressive Apollo Lunar Module display, complete with the boot prints and signature of Apollo 13's Fred Haise.
The LEM looks pretty big when it's mounted several feet above your head. But it looks pretty small for something that took men down to the surface of an unfriendly moon much colder than I was feeling that day.
I was looking forward to seeing more and went to ask about the next bus to the Space Center itself.
Would you believe I missed the last farking bus? Yup. It left for the Center at 2:30 p.m. I probably passed it on the way into the rest area parking lot.
To Be Continued...
Subscribe to:
Posts (Atom)